
Ingredients:
1 package (16 oz) poundcake mix (although any type of cake you like will really work)
1/4 cup green liquid food coloring
40 12" wooden skewers cut in half
2/3 cup flour
1 package (18 oz) refrigerated sugar cookie dough
1 16 oz bag confectioners sugar
3 egg whites
various colors of liquid food coloring
1 can (16 oz) chocolate frosting
1 package (9 oz) chocolate wafer cookies, finely crushed
16 small (3" wide 2 1/2" tall) new terra cotta or glazed ceramic flowerpots
Fill a 8" square pan with 1/2" water and 1/4 cup green food coloring.
Add skewers, rolling occasionally with fork, until dyed completely.
With tongs, set skewers onto paper towels to dry (about 45 minutes)
Next you should prep your cookies.
In a bowl, knead flour into sugar cookie dough until throughly combined.
Roll into a ball, place on a lightly floured waxed paper, flatten slightly, cover with another sheet of waxed paper, and then roll out dough to about 1/4" thick.
Transfer waxed paper to a baking sheet and freeze until firm, about 30 minutes.
Preheat oven to 350*
Line the pots each with 1 piece of foil large enough to overhang the sides sightly. Butter and flour each pot.
Prepare cake mix according to package directions and fill each pot with 1/3 cup batter.
Place pots on a cookie sheet and bake 18-20 minutes or until toothpick inserted into the center comes out clean.
Place pots on a wire rack to cool completely.
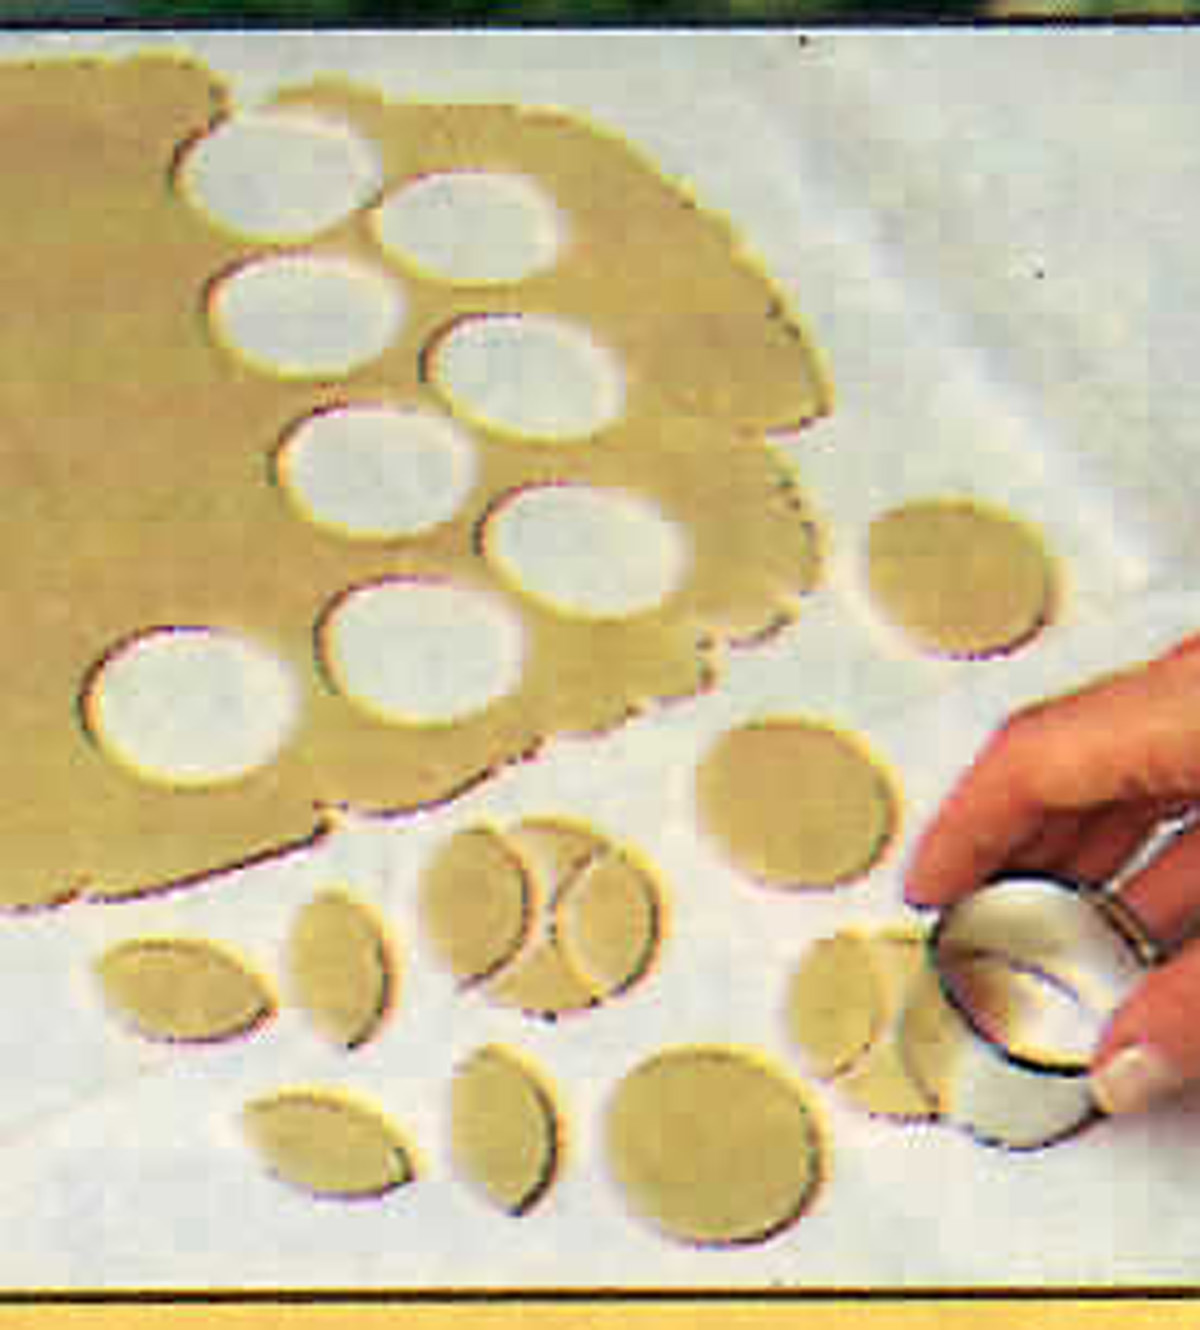 Remove cookie dough from freezer and remove top sheet of waxed paper. Using a 2" round circle cookie cutter, cut out 8 circles. Then, using the same cutter, cut out semi circles from the sides as shown in the picture to the left to make your leafs. Arrange leafs along the edges of an ungreased baking sheet. From remaining dough, use butterfly and flower cookie cutters (use multiple size flowers ranging from 1" to 3") to cut out the rest of your shapes. Arrange on ungreased baking sheets, spaced apart to save room for the skewers.
 Carefully insert dyed skewers 3/8" into base of all cookies. Bake 7-9 minutes or until golden. Place baking sheets on wire racks and cool 5 minutes. Remove from baking sheets and place directly on wire racks to cool completely.
 While the cookies are cooling, you can prepare the icing. On low speed, beat confectioners sugar with egg whites and 1 Tbl water until just combined. Increase speed to high, and beat until thick glossy peaks form (about 2 minutes). Divide into small bowls and tint with whatever food coloring colors you have chosen to use. Transfer each color to individual pastry bags fitted with small writing tips (or, if you don't have, place it into small plastic baggies with a very small part of the corner cut off). Outline cookies with icing and decorate as desired, filling in outlines and smoothing with a small spatula or back of a spoon. Let dry completely (at least an hour)
 Invert the cakes onto a clean surface and remove them from the pots. Peel off the foil and then line each pot with new foil, making sure none will show once cake is back in. Place cake back into pots, and spread about 2 Tbls frosting on each. Sprinkle each with cookie crumbs to cover. Insert cookie flowers and leaves into cakes, trimming skewers as needed. Now you are ready to proudly display and give away your lovely flower cake pots. Hope you enjoy!


